london

Damaged Marble Shower Wall before and after Restoration Ealing

Restoration of Viakal Damaged Marble Shower Tiles in Ealing

We recently received an enquiry from a customer in Ealing, East London who was concerned about their Marble Tiled Shower which had been damaged from the use of Viakal Limescale Remover. Unfortunately, this is a very common problem and we often receive calls from customers with similar issues. Limescale removal products such as Viakal and Cillit Bang are very effective but like any acidic product, they are very harmful to natural stone such as Limestone and Marble. With any cleaning product you should really read the label before use and in this case you will find they state the product should not be used on natural stone.

The Viakal had etched the surface of the Marble in several places where it had been applied and although the damage looked really bad I was happy to inform my customer there is a solution and that I could indeed restore the appearance of the stone.

Damaged Marble Shower Wall Before Restoration Ealing Damaged Marble Shower Wall Before Restoration Ealing

Polishing Damaged Marble Shower Tiles

My first task was to give the Marble tile and grout a good clean and remove any sealer and soap scum etc; to do this I used a strong dilution of Tile Doctor Pro-Clean scrubbed in with a small black scrubbing pad fitted to a hand-held machine. The Marble tiles were then rinsed with water to remove the soil generated by the cleaning process.

To fully restore the appearance of the Marble the next step required the application of coarse burnishing pads applied in sequence from very coarse to very fine using six-inch pads fitter to a handheld buffer. It’s a process that takes the polish off the stone and rebuilds it. A little water is needed to help lubricate with the coarser pads and the tiles are rinsed off between each one to remove any slurry generated during the process.

To achieve a very high shine the Marble tiles were then treated to an application of Tile Doctor Shine Powder which involves buffing crystallising polishing powder into the stone to build a deep durable finish

Sealing Marble Shower Tiles

The last step was to seal the Marble tile and grout to protect it going forward. Before sealing we needed to make sure that the tiles are dry and a damp meter is a very useful tool for this. A single coat of Tile Doctor Colour Grow was applied which is an impregnating sealer that occupies the pores in the stone whilst enhancing the natural colours in the Marble in the process.

Damaged Marble Shower Wall After Restoration Ealing Damaged Marble Shower Wall After Restoration Ealing

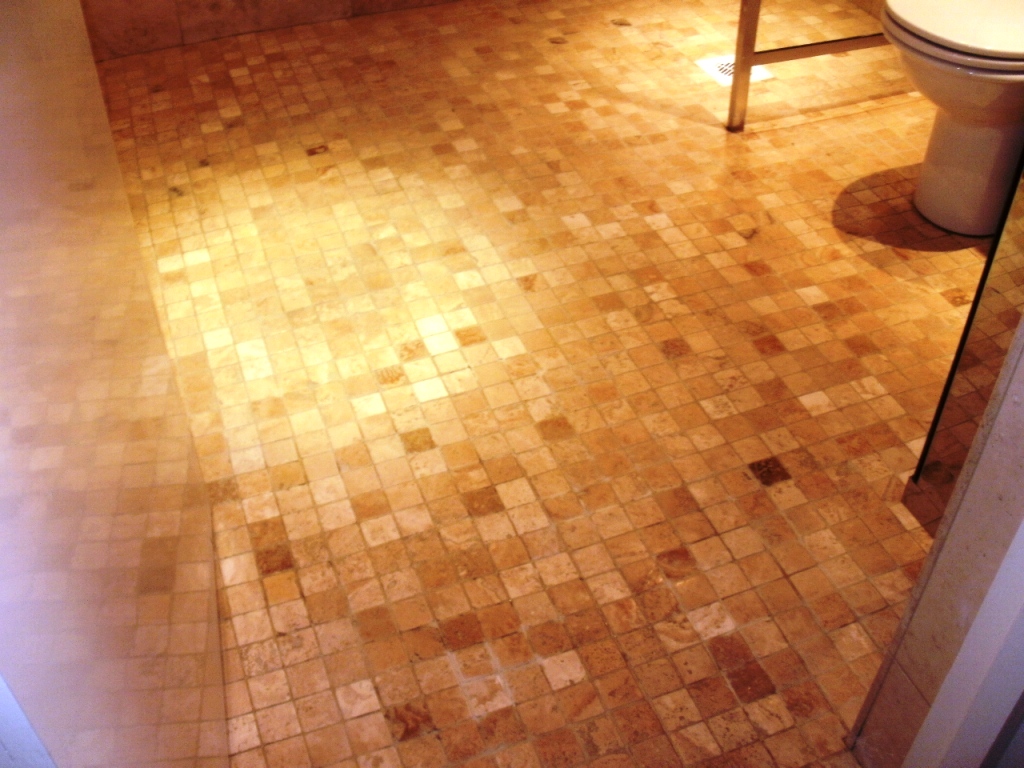
The work took three days in total but as you can see from the photographs on this page it was well worth the effort and the white streaky damage caused by the Viakal has now been removed and the stone has been transformed. My customer was very happy with the results and left the following feedback.

I had serious acid etchings from spraying Viakal on my marble shower box and basin. Didi and his partner did a good job of polishing out the majority of the acid etchings. It was a 3 day job for them, and over all I was happy with the result and service.
Edward T, London

Acid Etched Marble Shower Tiles Restored in London

Restoration of Viakal Damaged Marble Shower Tiles in Ealing Read More »

Limestone Floor Damaged by Acid before and after Restoration Wapping

Acid-Damaged Limestone Tiles Restored to New in Wapping

All carbonate materials, including those used in building and construction, are sensitive to acid deposition. A common example of this is the reaction that occurs when you combine bicarbonate of soda and vinegar. Another example of a material affected by this is Limestone, which is often used as tiled flooring. When exposed to acidic products, the damage caused to Limestone tiles is both material and aesthetic, and many property owners who suffer this kind of damage assume that they are beyond repair.

I was recently called to a property in Wapping, Central London, to take a look at a damaged Limestone tiled floor situated in a wet room. The surface of the stone had suffered heavily from corrosion due to the spillage of an acidic solution and the property owner was keen to see what could be done to restore the condition of the tiles. He had been told by another company that the floor was beyond repair, but I knew that with the right products and techniques that I could provide a full restoration.

Limestone Floor Damaged by Acid Before Restoration Wapping

Cleaning and Burnishing Acid-Damaged Limestone

My first attempt at reducing the acid stain was to apply Tile Doctor Reduxa, which is formulated to remove or significantly lighten stains caused by acidic beverages such as cola and white wine, as well as acid-based household cleaners.

I followed this by rinsing the tiles with water rinse and applying Tile Doctor Pro Clean solution, a high alkaline product that would neutralise the acid and stop it from causing any further damage. After leaving the Pro Clean to dwell on the Limestone for ten minutes, I used a handheld rotary buffer fitted with a small black scrubbing pad to remove any dirt, soap scum, and excess old sealer from the tiles and grout lines. Next, the floor was carefully rinsed with water to make sure no chemical residue remained from the cleaning products.

Although the situation was significantly improved, the stain remained visible, so the next step was to re-surface the tile using a set of diamond encrusted burnishing pads of different grades. I started with a Coarse grit diamond encrusted pad to grind away the damage layer of stone, and followed this by applying Medium, Fine and Very Fine pads to slowly hone and polish the floor, back to its original condition.

Sealing Limestone Tiles

I left the tiles to dry completely overnight before returning to the property the next day. With the acid stain removed, it was time to re-seal the floor using Tile Doctor Colour Grow, a colour- enhancing, impregnating sealer that is particularly effective at boosting the appearance of Limestone.

Limestone Floor Damaged by Acid After Restoration Wapping
The result was very satisfying for both myself and the customer. In fact, the customer even when so far as to leave the following feedback on the Tile Doctor Feedback System.

“Didi is indeed very knowledgeable and professional. I was more than a little worried by Limestone corrosion due to accidental spillage of a corrosive substance in our wet room. Didi came to sort it out for us and what to the layman looked like a catastrophe and possible new tiling operation was expertly repaired by Didi and his team. Our wet room now looks like new, much better than before in fact, and we are very grateful to Didi and also Tile Doctor for being able to head straight for the problem and sort it out so efficiently. Highly recommended!”

Professional Acid-Damaged Limestone Tiled Floor Restoration in London

Acid-Damaged Limestone Tiles Restored to New in Wapping Read More »

Victorian Tile After Cleaning in London

Victorian Hallway Tile Restoration in London W2

This large entrance hall tiled in Victorian black and white floor tiles in London W2 had been quite badly damaged in the past by having a carpet glued and nailed on to it. Many tiles were broken or missing and those missing had been replaced by cement.

Victorian-Tile-Before-Cleaning-in-London.jpg

Cleaning a Victorian Floor

On the first day of this three day job I removed the cement filling and extracted the nails that remained in the floor. I then stabilised the exposed area with a PVA solution before replacing the missing tiles with replica or salvaged ones to match the floor was swept out and vacuumed to remove all loose debris.

On the second day I cleaned the floor, removing the old carpet glue with Tile Doctor “Remove and Go” which was left to dwell onto the tile for a while to allow it to soak into the tile and break down the adhesive; this was then removed with a wet vacuum. The next step was to clean the tiles using Tile Doctor Pro-Clean which was worked in with a black srubbing pad to scrub the cleaning solution into the tile and finish off the cleaning process, again the soiled solution was removed with a wet vacuum. Normally by now the floor would of have been clean however In this case the levels of soaked-in old glue and ground-in dirt from decades of use were such that the floor also required steaming, scraping and wire brushing with a Spid brass wire brush before a final clean with another round of Pro-Clean and a black buffing pad fitted to a Numatic buffing machine. This had the desired affect and the last step was to wash the floor down with clean water to remove any remaining chemicals etc.

Sealing a Victorian Floor Sealing

After leaving the floor to dry overnight I came back the third day to seal the floor using four coats of Tile Doctor Seal and Go which is ideal for Victorian tiled floors as it leaves a low sheen finish whilst providing excellent stain protection.

Victorian-Tile-After-Cleaning-in-London
As you can see from the ‘before’ and ‘after’ photos the results were impressive and the customer described it as, “looking great”.

Victorian Tiled floor cleaned and sealed in West London

Victorian Hallway Tile Restoration in London W2 Read More »

Tumbled Marble London After

Cleaning a Tumbled Marble mosaic wet room floor in London SE1

This Tumbled Marble mosaic wet room floor was installed in a house in London, SE1 four years before prior and was now looking a little tired. This was mostly caused by a build-up of Limescale which had then become grimy.

Tumbled-Marble-London-Before

Stripping a Tumbled Marble Floor

To treat the Limescale I used Tile Doctor Grout Clean Up which managed to remove most of the scale and to remove the remainder I steamed the tiles using an Earlex Steamer and carefully scraped any remaining Limescale residue away with a Stanley window scraper. To restore the marble itself I used Tile Doctor burnishing pads to re-polish the tiles using 17″ pads on the main area and 8″ pads on a hand-held Clarke polishing machine in the corners. These diamond encrusted pads come in a number of different colours and are applied one after another with each pad being a finer grade than the last. After thoroughly rinsing the stone again and removing the waste water with a wet vacuum. As the marble was naturally fast drying I used an Earlex heat gun to speed dry the floor and repeated this after lunch to ensure the floor was entirely dry before sealing.

Sealing Tumbled-Marble Tiles

Once the Marble tiles were dry I started to seal them using two coats of Tile Doctor Colour Grow sealer which is a great choice for natural stone as it enhances the natural colours in the tile as well as providing stain protection.

Tumbled-Marble-London-After
As the photographs show the results were very good and the customer was highly delighted.

Tumbled-Marble-London-After
 

Restoring Tumbled Marble Mosaic in a Wet Room

Cleaning a Tumbled Marble mosaic wet room floor in London SE1 Read More »

Ceramic Tile Cleaning before and after

Ceramic Tiled Floor Cleaned in London W9

These ceramic tiles situated in a large flat in Bravington Road W9 which is near Kensal Town in the City of Westminster, London. The tiles had been in place when the client moved into the flat some years ago and were badly in need of deep cleaning, attempts to remove the dirt using a steam cleaner had been successful but very slow. In the end the owner, realising that cleaning more than 75 square metres of tile herself in this way was going to take too long, decided to call in professional help from Tile Doctor.

Ceramic Tile Cleaning Before

Cleaning Ceramic Tiles

Using Tile Doctor Pro-Clean which is a heavy duty alkaline cleaning product and a medium brush on a Numatic buffing machine I lifted most of the ground-in dirt from the tiles before rinsing and scrubbing the floor again with a black buffing pad and scrubbing the grout clean by hand using a stiff grout brush.

Ceramic Tile Cleaning During
I then thoroughly washed the floor with a mop and fresh water which was then removed with an aqua vacuum, this process was repeated until I was satisfied the floor was clean. When the floor was dry it revealed an nearly as-new ceramic tiled floor with a pleasing sandstone imitation design.

The photos show the floor before cleaning with a mark around where a piece of furniture had been removed and then the uniformly clean floor after the cleaning process was complete. The customer was delighted with the restored condition of her floor and amazed that it could have been made so clean.

Ceramic Tile Cleaning After
 

Ceramic Tiles Deep Cleaned in London W9

Ceramic Tiled Floor Cleaned in London W9 Read More »

Scroll to Top