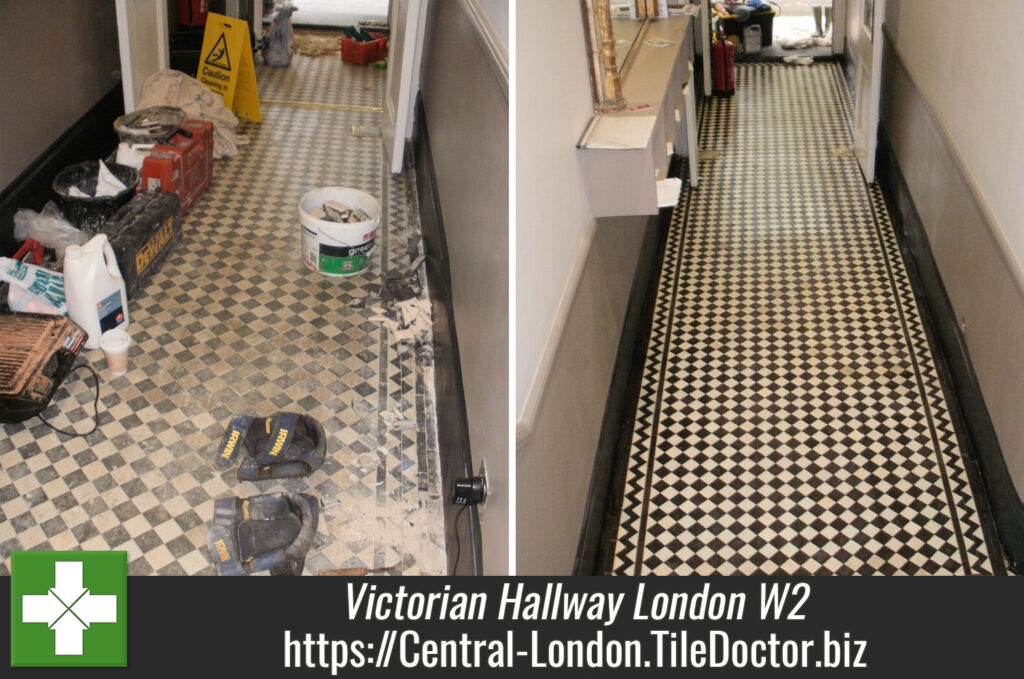
Victorian Hallway Tile Restoration in London W2
This large entrance hall tiled in Victorian black and white floor tiles in London W2 had been quite badly damaged in the past by having a carpet glued and nailed on to it. Many tiles were broken or missing and those missing had been replaced by cement.

Cleaning a Victorian Floor
On the first day of this three day job I removed the cement filling and extracted the nails that remained in the floor. I then stabilised the exposed area with a PVA solution before replacing the missing tiles with replica or salvaged ones to match the floor was swept out and vacuumed to remove all loose debris.
On the second day I cleaned the floor, removing the old carpet glue with Tile Doctor “Remove and Go” which was left to dwell onto the tile for a while to allow it to soak into the tile and break down the adhesive; this was then removed with a wet vacuum. The next step was to clean the tiles using Tile Doctor Pro-Clean which was worked in with a black srubbing pad to scrub the cleaning solution into the tile and finish off the cleaning process, again the soiled solution was removed with a wet vacuum. Normally by now the floor would of have been clean however In this case the levels of soaked-in old glue and ground-in dirt from decades of use were such that the floor also required steaming, scraping and wire brushing with a Spid brass wire brush before a final clean with another round of Pro-Clean and a black buffing pad fitted to a Numatic buffing machine. This had the desired affect and the last step was to wash the floor down with clean water to remove any remaining chemicals etc.
Sealing a Victorian Floor Sealing
After leaving the floor to dry overnight I came back the third day to seal the floor using four coats of Tile Doctor Seal and Go which is ideal for Victorian tiled floors as it leaves a low sheen finish whilst providing excellent stain protection.

Victorian Tiled floor cleaned and sealed in West London
Victorian Hallway Tile Restoration in London W2 Read More »