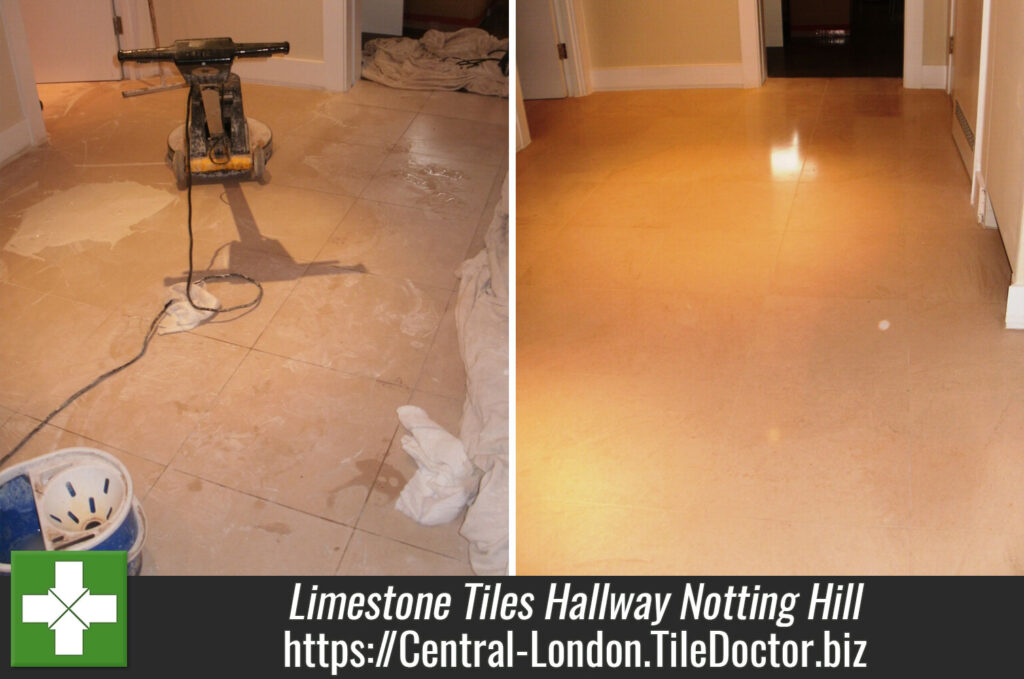
This was a Limestone tiled hallway at a house in Notting Hill, London W2 where extensive renovations had just been completed. The floor had been badly affected by being left uncovered during the building works as well as having a build-up of many years of dirt and stains on its surface. The tiles had been laid more than twenty years ago and had not been cleaned or sealed since.
The customer was considering replacing the floor as she believed that it was beyond restoring. As well as ingrained dirt there were several quite severe rust stains and large ring-shaped marks that looked as if they had come off the bottom of paint or varnish tins.

Cleaning the Limestone Tiled Floor
I used a black buffing pad on my Numatic buffing machine and neat Tile Doctor “Pro-Clean” to perform an initial deep clean on the floor. In order to re-polish the floor and not leave it too porous I then used the a red and then a white diamond encrusted burnishing pad. Even after this some stains remained, so at this point I used Tile Doctor “Reduxa” stone stain remover to attack the stubborn ingrained marks. All of these were successfully removed except for two very deep rust stains which, never-the-less, were reduced in size and intensity by about 70%.
After this I used a yellow burnishing pad to return the floor to its original finish.
At this point, as one of the tiles was broken at the edge and a piece missing, I used Akemi stone floor repair filler to fill in the broken piece with a filler that is stronger than the original stone.

Sealing the Limestone Floor
The next day I returned to seal using Tile Doctor “Colour Grow” Sealer.
Unfortunately, I forgot to take a “before” picture until after I had started this job but still the transformation is clear from the photos that I took. When the limestone was fully restored it was found to have attractive bedding lines running through it and to be all-in-all a very nice looking floor.

