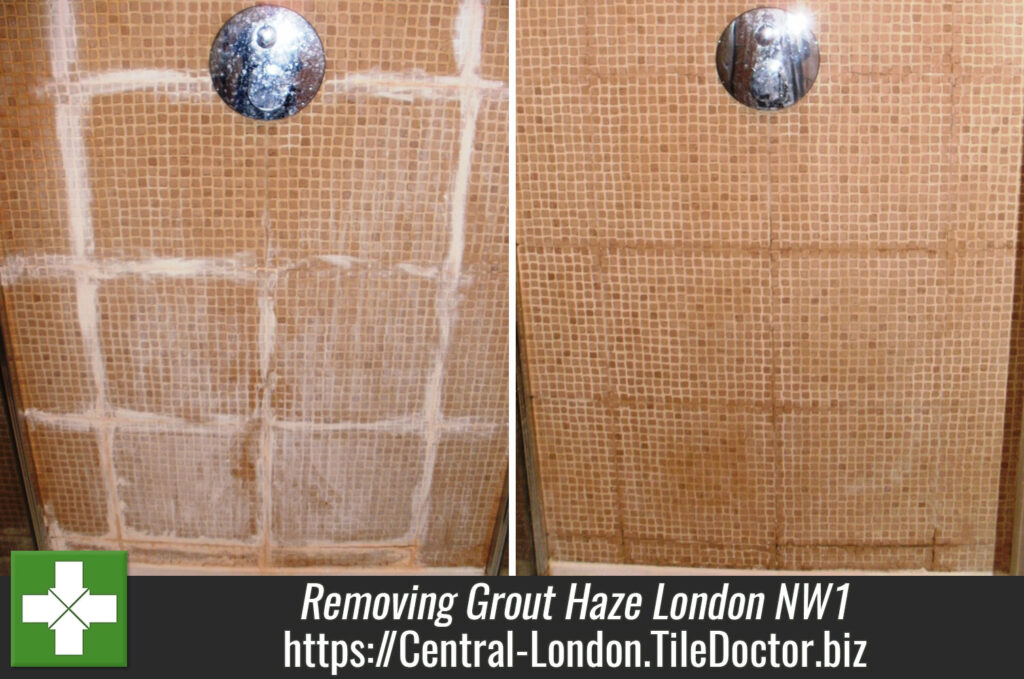
These ceramic mosaic tiles were fitted in square sheets in a shower cubicle at house in London NW1. You can clearly see from the first photograph that the tiler did not remove the grout from the tile before it set leaving grout haze on most of the tile and a nice white band of grout between the mosaic sheets.
Removing Grout Haze
To clean up the ceramic tiles and remove the grout we sprayed on Tile Doctor Grout Clean-up which is a specialist acid based product that penetrates below the surface of the grout to remove allowing it to be removed. It’s reasonably easy to apply, you need to wet the tile first and then apply a dilution of the Grout Clean-up, leave it dwell on the tile for a few minutes allowing it to get to work and then scrub it in. With it being an acid it’s important not to leave it on the tile very long and wash it off within five minutes and rinse down the tile with water.
 |
 |
Cleaning Ceramic Mosaic Tiles
Once the tiles were free of grout the next step was to clean the tiles for which we used Tile Doctor Pro-Clean which is a versatile alkaline tile cleaning product that can be diluted in different strengths depending on if your looking to clean the tile or strip sealers. In this case we could also of used Tile Doctor Oxy-Pro shower Tile and Grout Cleaner which is a ready to use tile and grout cleaner that comes with a spray nozzle attachment, the spray allows the cleaning agent to mix with air making it lighter and easier to stick to vertical surfaces. This is important as you need to let the cleaning agent dwell on the surface of the tile and grout for a few minutes before scrubbing it by hand with a stiff brush and then washing it off with clean water.
The ceramic mosaics did not need sealing so the renovation was now complete, grout removed and tiles cleaned, and naturally the customer was very pleased with the results and the cubicle was transformed.
