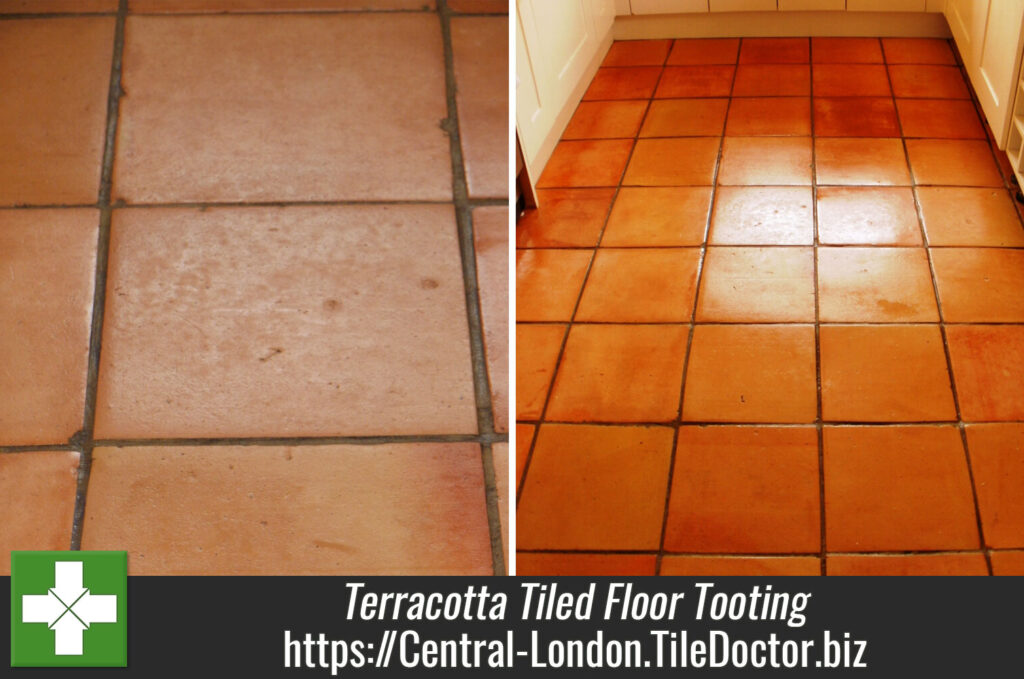
Terracotta Floor Tile Restoration in Clapham SW9
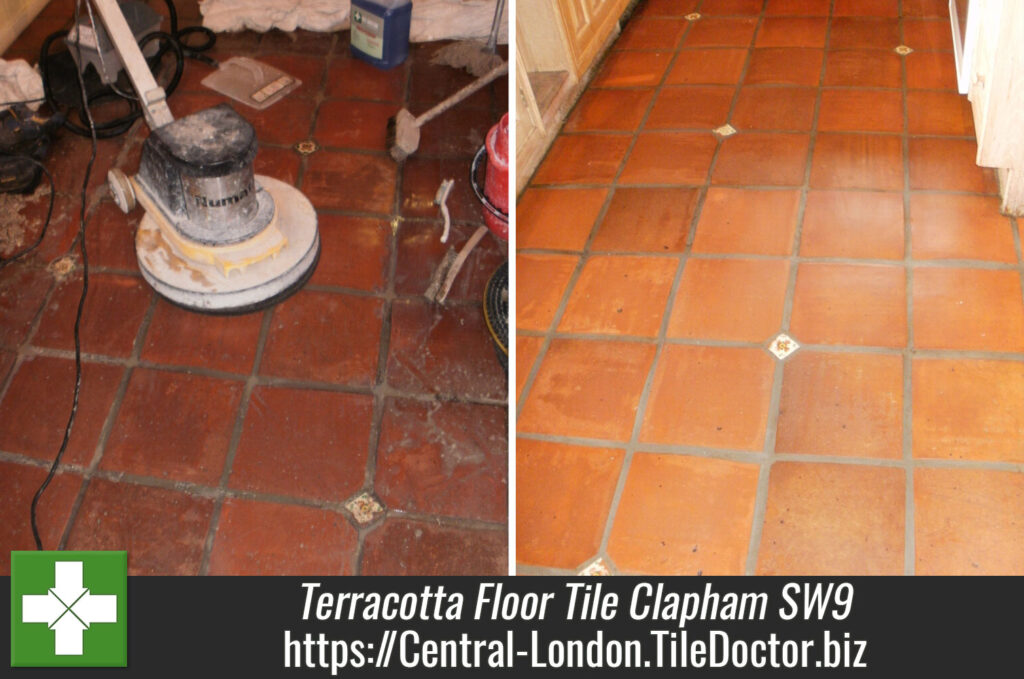
We had our work cut out for us restoring this Terracotta floor installed in the kitchen of a house in Clapham, south west London. Over the years it had been covered with many layers of metallised emulsion polish, this had been put on without a primer and Terracotta being porous it had soaked into the tile. Various efforts to remove it in the past had not been successful and had resulted in some damage to the floor. This had been covered by yet more layers of metallised emulsion which had yellowed and oxidised over time.

Cleaning Terracotta Tiles
Working in stages, I laid down Tile Doctor Remove and Go, which is a powerful coating remover, to break down the layers of metallised emulsion and then steamed the tiles and scraped and wire-brushed the remnants of it away. Once this was done more Remove and Go was applied to the terracotta tile to remove the polish that had sunk deep into the tile when it was first applied more than twenty years before. Again a steamer was required to help bring out what was left of the original misused sealer! Once I was happy this was followed by a thorough clean with a dilution of Tile Doctor Pro-Clean scrubbed in with a black buffing pad fitted to a Numatic floor buffing machine. Last step was to give the floor a thorough rinse with water in order to remove any remaining chemical and neutralise the Terracotta.

Sealing Terracotta Floor Tiles
After two days work cleaning the floor I left it to dry out overnight and returned to seal on the third day using six coats of Tile Doctor Seal and Go which will protect the floor and also gives the surface an attractive low sheen. You can see the transformation in the floor and the customers were very impressed and preferred the lightened natural look compared to its previous appearance.

Terracotta Tiles Transformed in South London.
Terracotta Floor Tile Restoration in Clapham SW9 Read More »